Do the Haiku!

Introduction
Haiku OS is an open-source successor to BeOS. If we had to describe it in one word, it would be charming. If you've ever wanted to write a program for this niche and enthusiast-driven retro operating system but were intimidated by cross-compilers, debuggers, and other complexities, this guide is for you.
Here, I will show you how to bypass much of that complexity and compile programs for Haiku from the comfort of your VSCode setup while debugging them on a Haiku VM.
First Set Up Haiku OS
Download the latest Haiku OS here and install it.
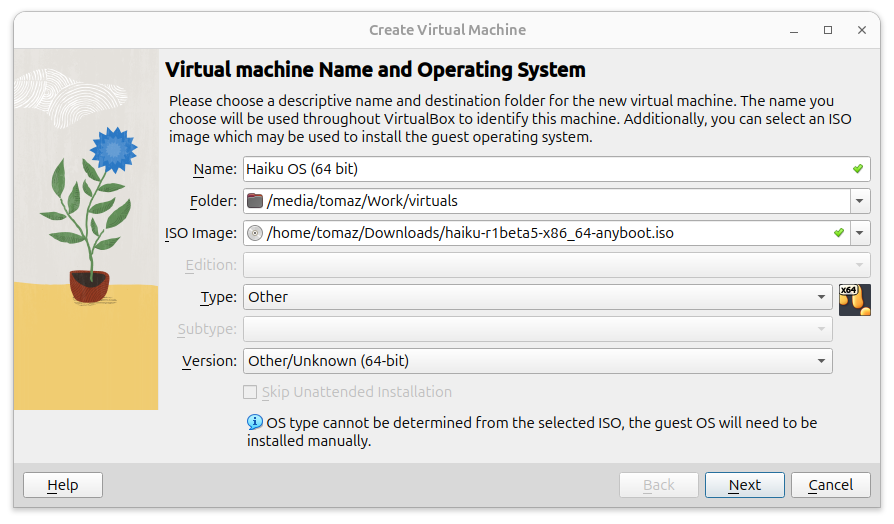
I am running Haiku OS Release 1 Beta 5 (64-bit) on VirtualBox on Linux, so I will describe that installation scenario. However, apart from VirtualBox-specific steps, the procedure is the same for any environment.
VirtualBox Installation
Create a new virtual machine and select Type: Other and Version: Other (64-bit). I recommend the following settings:
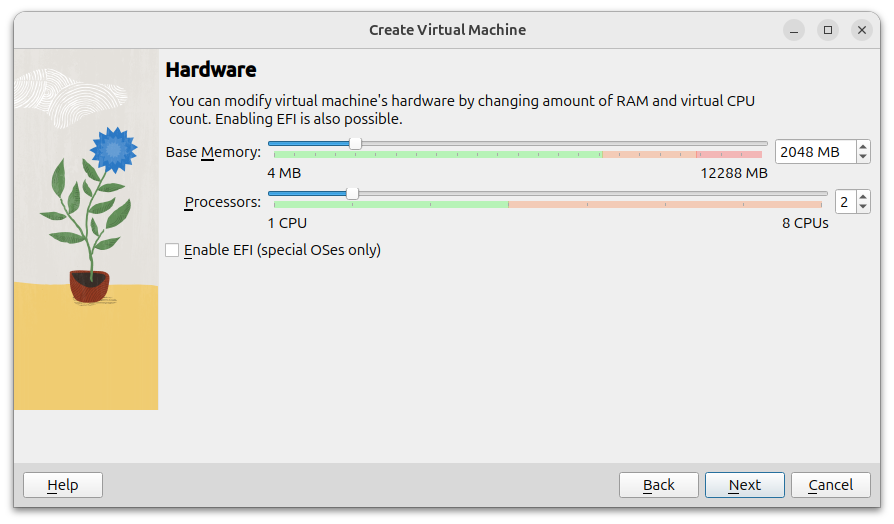
- 2 CPUs
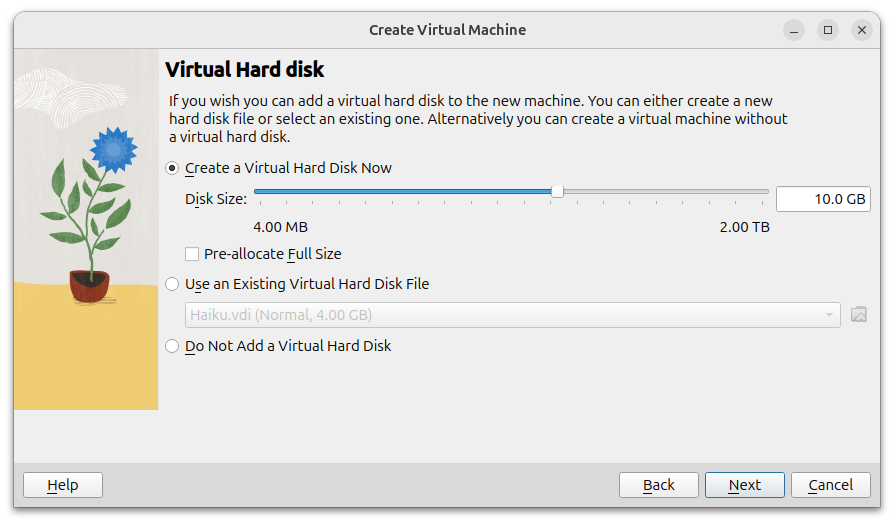
- 10GB hard disk
- 2GB RAM
- 128MB video memory
- Bridged network adapter
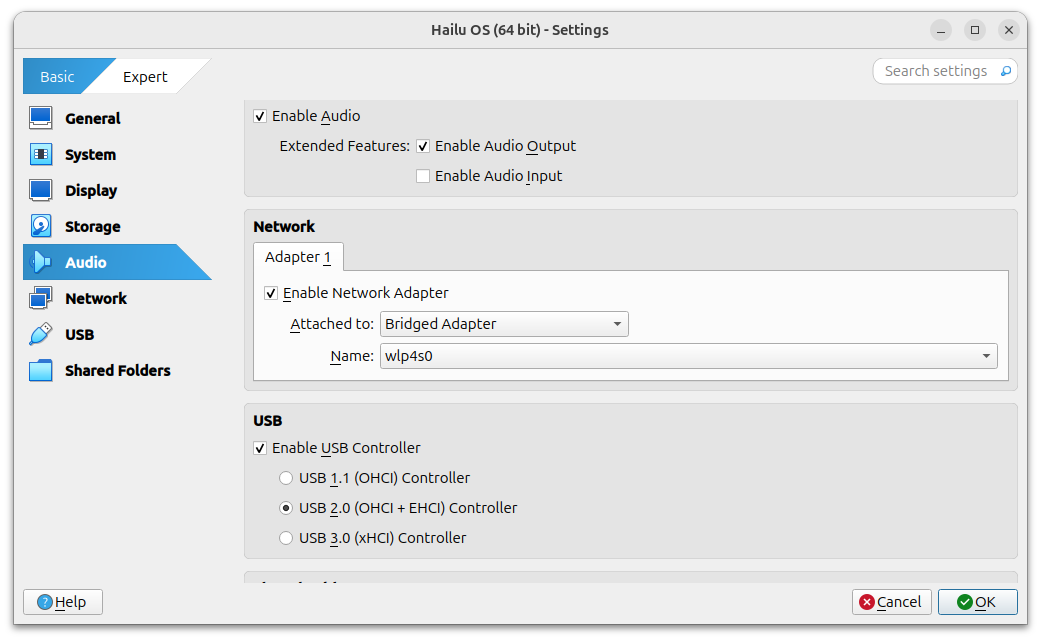
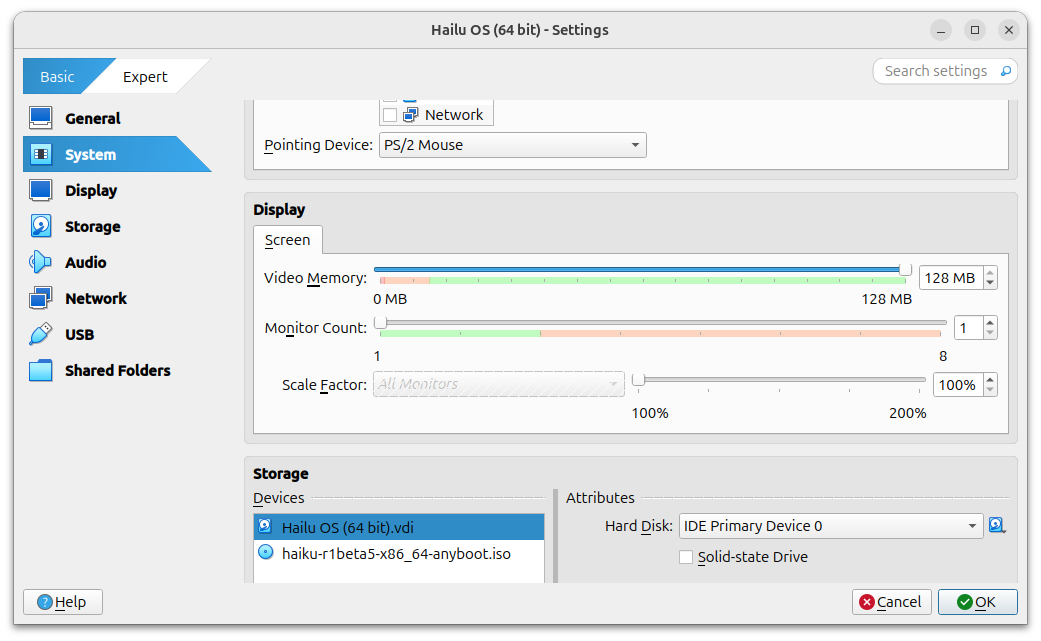
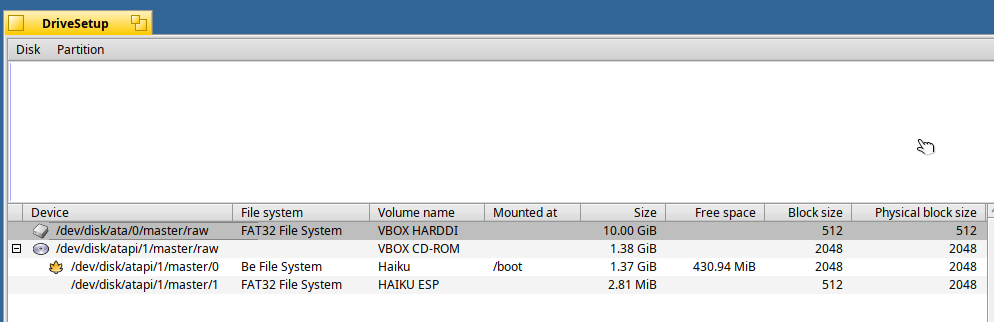
For Haiku OS installation, create a Be File System (BFS) partition on your virtual hard disk and install Haiku on it.
Initial clicks inside the Haiku OS window will capture your mouse. To release it, press the Right Ctrl key on your keyboard.
Adding VirtualBox Guest Additions
After starting Haiku OS, open Haiku Depot, select all packages, and enter virtualbox in the search box. After installing the additions, you will gain two very useful features: mouse integration and dynamic screen resolution.
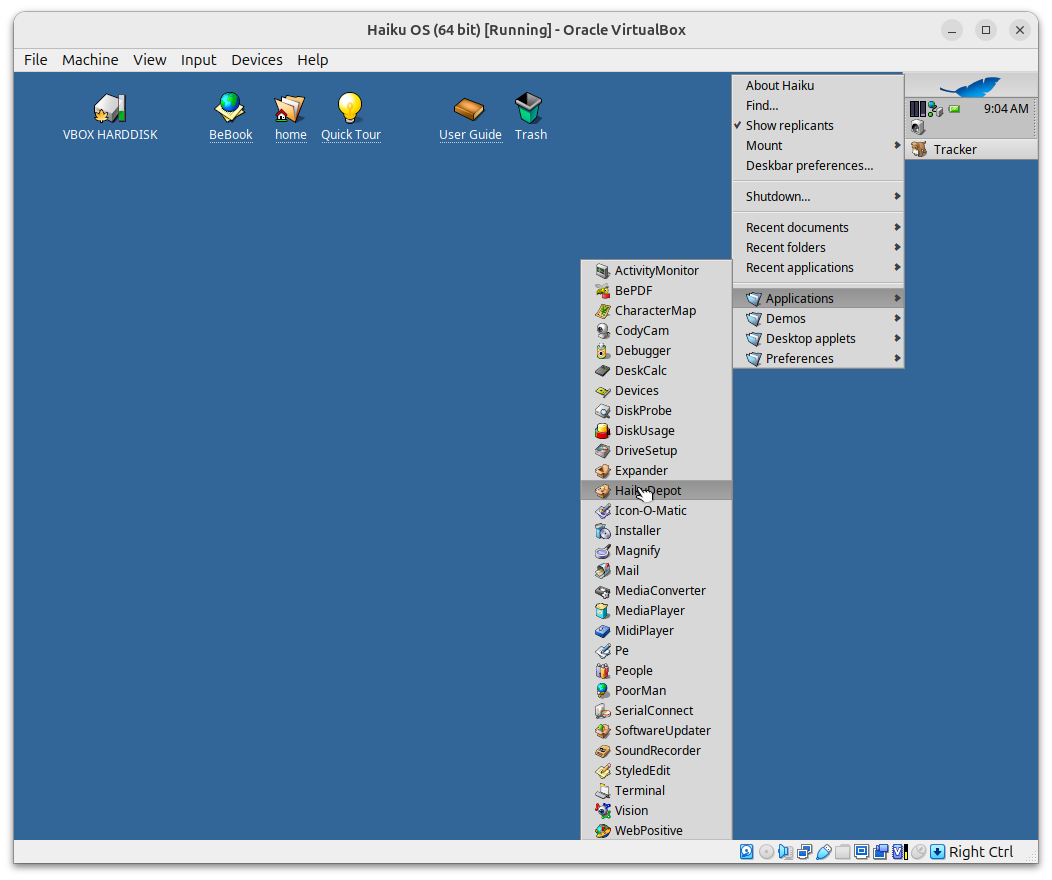

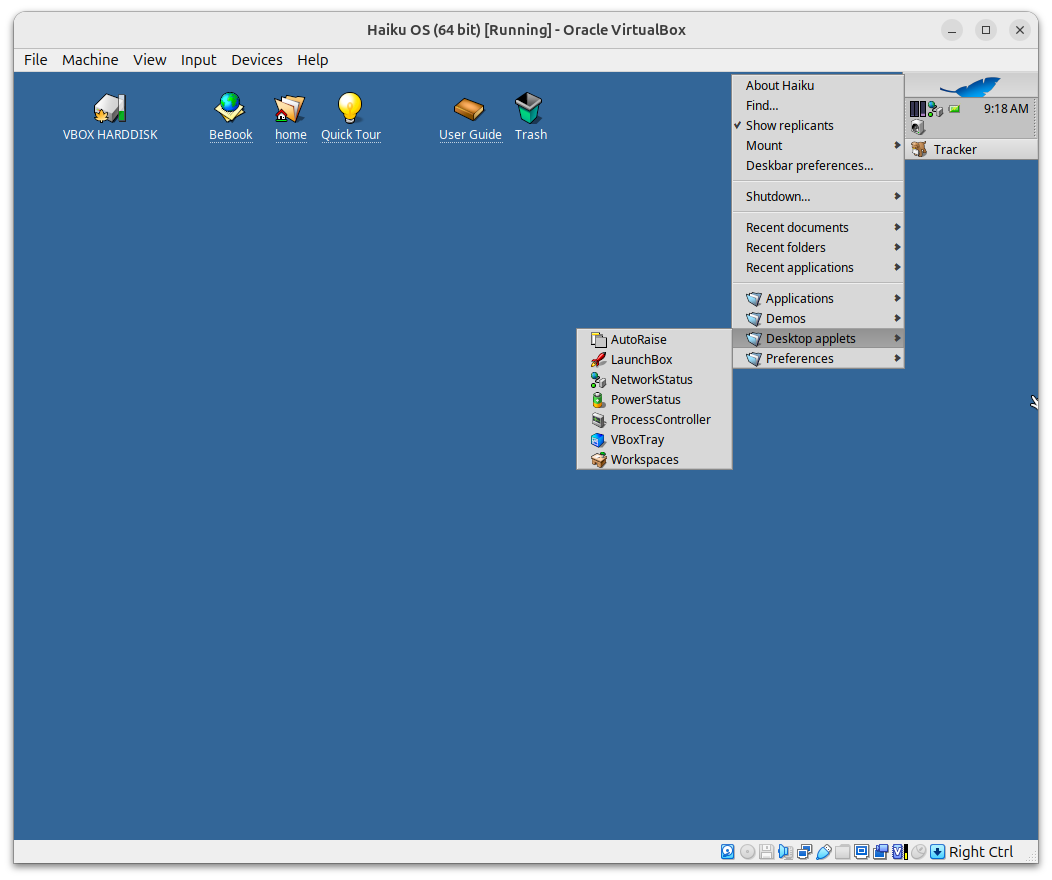
Mouse integration works automatically, but dynamic resolution needs to be manually configured. Open Haiku's Desktop Applets and run VBoxTray. Then, go to the VirtualBox View menu and select Auto-resize Guest Display.
Enabling SSH Access
To enable SSH access, you first need to determine the IP address of your Haiku system. Since Haiku's terminal runs bash and supports basic Unix commands, simply type:
ifconfig
Next, install and start the SSH daemon.
Installing and Running sshd
pkgman install openssh
/bin/sshd
The first command installs the SSH daemon into the /bin folder, and the second one starts it.
Configuring sshd for Password Login
You’ll log in using Haiku’s default user, named user. Since Haiku is a single-user system, this default account doesn’t have a password. You’ll need to create one by typing:
passwd
After setting your password, you must enable password authentication for SSH login. Open the Haiku SSH configuration file:
nano /system/settings/ssh/sshd_config
Yes, Haiku OS comes with the beloved nano editor by default.
Find and modify (or add) the following lines:
PasswordAuthentication yes
ChallengeResponseAuthentication yes
PermitRootLogin yes
PubkeyAuthentication yes
Next, restart the SSH daemon. First, find its process ID (replace sshd-process-id with the actual process ID in the example below):
ps | grep sshd
kill sshd-process_id
/bin/sshd
You can now test password login from your Linux PC (replace your-haiku-ip with the IP address of your Haiku machine):
ssh user@your-haiku-ip
Logging in via SSH Without a Password
Since you’ll likely use your Haiku system for debugging, you probably don’t want to enter your username and password every time. To set up SSH key-based authentication, follow these steps.
On your Linux PC, generate a new SSH key:
ssh-keygen -t rsa -b 4096 -f ~/.ssh/id_rsa
When prompted for a passphrase, just press Enter twice to leave it empty. Then copy the public key to your Haiku system:
ssh-copy-id -i ~/.ssh/id_rsa.pub user@your-haiku-ip
Now, edit the Haiku SSH configuration file again:
nano /system/settings/ssh/sshd_config
Update it to:
PasswordAuthentication no
ChallengeResponseAuthentication no
PermitRootLogin prohibit-password
PubkeyAuthentication yes
AuthorizedKeysFile boot/home/.ssh/authorized_keys
Restart sshd, and you should now be able to log in without a password.
A Touch of Elegance
If you don’t want to type the IP address every time, you can optionally create a name for your Haiku machine that SSH will recognize. You can set this up in two places.
Let’s assume your IP address is 192.168.1.149.
You can either edit the /etc/hosts file and add a mapping for your IP address:
192.168.1.149 haiku-vm
Or you can create a ~/.ssh/config file with the following content:
Host haiku-vm
    HostName 192.168.1.149
    User user
    IdentityFile ~/.ssh/id_rsa
    IdentitiesOnly yes
    RequestTTY force
Both methods will allow you to use haiku-vm as the host name. You can now test the connection by running:
ssh user@haiku-vm
Installing Tools on Haiku OS
Haiku brings its own compilation suite including gcc and g++, but you will need to add gdb, cmake, and rsync on your. Go to your Haiku Terminal and type
pkgman install cmake
pkgman install gdb
pkgman install rsync
pkgman is a command line version of the Haiku Depot for those of us who prefer using the command line.
Congratulations! Your Haiku system is now ready for development.
Set Up Your Project in Visual Studio Code
Now it's time to prepare the project you will compile and debug on your Haiku machine. This will be a simple C++ program located inside the src/ directory that displays a basic message in a window.
Hello Haiku
Below is the C++ code for our main.cpp.
#include <Application.h>
#include <Window.h>
#include <View.h>
#include <StringView.h>

class HelloWorldWindow : public BWindow {
public:
    HelloWorldWindow()
        : BWindow(BRect(100, 100, 400, 200), "Hello Haiku", B_TITLED_WINDOW, B_QUIT_ON_WINDOW_CLOSE) {
        BView* background = new BView(Bounds(), "background", B_FOLLOW_ALL, B_WILL_DRAW);
        background->SetViewColor(ui_color(B_PANEL_BACKGROUND_COLOR));
        AddChild(background);

        BStringView* helloText = new BStringView(BRect(20, 20, 280, 40), "hello", "Hello Haiku!");
        background->AddChild(helloText);
    }
};

class HelloWorldApp : public BApplication {
public:
    HelloWorldApp() : BApplication("application/x-vnd.HelloHaiku") {}

    void ReadyToRun() {
        HelloWorldWindow* window = new HelloWorldWindow();
        window->Show();
    }
};

int main() {
    HelloWorldApp app;
    app.Run();
    return 0;
}
CMakeLists.txt
Now create the CMakeLists.txt file in the root directory to build the program.
cmake_minimum_required(VERSION 3.10)

# Project Name
project(HaikuSexProject)

# Set C++ standard
set(CMAKE_CXX_STANDARD 17)
set(CMAKE_CXX_STANDARD_REQUIRED ON)

# Target system (Haiku)
set(CMAKE_SYSTEM_NAME Haiku)

# Set Debug Build Type
if(NOT CMAKE_BUILD_TYPE)
    set(CMAKE_BUILD_TYPE Debug)
endif()

# Define source files
set(SRC_FILES src/main.cpp)

# Add the executable
add_executable(HaikuSex ${SRC_FILES})

# Find Haiku system include directories and libraries
find_path(HAIKU_INCLUDE_DIR NAMES app/Application.h PATHS /boot/system/develop/headers/be)
find_library(HAIKU_LIB_BE NAMES be PATHS /boot/system/develop/lib)

# Include Haiku headers
target_include_directories(HaikuSex PRIVATE ${HAIKU_INCLUDE_DIR})

# Link against Haiku's BeAPI
target_link_libraries(HaikuSex PRIVATE ${HAIKU_LIB_BE})
It's time to create our tasks.json and launch.json files.
tasks.json
There are two tasks that need to be executed before we can start debugging our software:
- We need to copy all source code files to the Haiku machine.
- We need to run
g++on the Haiku machine and compile the code there.
Here is the file that accomplishes this:
{
    "version": "2.0.0",

    "tasks": [
        {
            "label": "Sync to Haiku VM (rsync)",
            "type": "shell",
            "command": "rsync",
            "args": [
                "-avz",
                "--rsync-path=/boot/system/bin/rsync",
                "-e",
                "ssh -T -o 'RemoteCommand=none' -o 'RequestTTY=no'",
                "/media/tomaz/Work/sex/",
                "user@haiku-vm:/boot/home/Projects/sex/"
            ],
            "problemMatcher": [],
            "group": {
                "kind": "build",
                "isDefault": false
            }
        },
        {
            "label": "CMake Configure (Haiku VM)",
            "type": "shell",
            "command": "ssh",
            "args": [
                "user@haiku-vm",
                "cd /boot/home/Projects/sex/ && cmake -B build -G \"Unix Makefiles\" -DCMAKE_BUILD_TYPE=Debug"
            ],
            "problemMatcher": [],
            "dependsOn": ["Sync to Haiku VM (rsync)"]
        },
        {
            "label": "Build (Haiku VM)",
            "type": "process",
            "command": "bash",
            "args": [
                "-c",
                "ssh user@haiku-vm 'cd /boot/home/Projects/sex/build && make -j4' | sed 's|/boot/home/Projects/sex|/media/tomaz/Work/sex|g'"
            ],
            "group": {
                "kind": "build",
                "isDefault": true
            },
            "problemMatcher": "$gcc",
            "dependsOn": ["CMake Configure (Haiku VM)"]
        }
    ]
}
The Sync to Haiku VM (rsync) task uses rsync to copy the the project to the Haiku machine.
Only files that have changed are copied.
The next task, called CMake Configure (Haiku VM), runs CMake on the Haiku machine to generate a Makefile for the project.
Finally, the Build (Haiku VM) task executes make on the Makefile generated in the previous step and uses set to re-map paths from the Haiku station to your Linux PC.
All tasks are interdependent. After executing all three, you should have a built version of your software on the haiku-vm machine.
You need to change the folders in the
tasks.jsonand create an empty directory on Haiku. The rsync will not do that for you.
launch.json
After defining the VSCode tasks, we need to create a launch configuration to run and debug the software on the Haiku machine. Before proceeding, make sure you have the Native Debug extension installed in your VSCode.
This configuration assumes your program is located in the /boot/home/Projects/first directory, with the executable inside the build/myprogram subdirectory.
It maps the source directories in the debug information inside the executable to the corresponding directory on the Haiku machine. All gdb traffic is routed through an SSH channel to the integrated terminal in VSCode.
Finally, it compiles your software before starting the debugging session.
{
    "version": "0.2.0",
    "configurations": [
        {
            "name": "Debug on Haiku VM",
            "type": "cppdbg",
            "request": "launch", // You can switch this to "attach" later
            "program": "/boot/home/Projects/sex/build/src/core/HaikuSex",
            "cwd": "/boot/home/Projects/sex/build/",
            "MIMode": "gdb",
            "ssh": {
                "host": "haiku-vm",
                "user": "user"
            },
            "pipeTransport": {
                "pipeProgram": "ssh",
                "pipeArgs": [
                    "-T",
                    "user@haiku-vm"
                ],
                "debuggerPath": "/bin/gdb"
            },
            "setupCommands": [
                {
                    "text": "-exec set pagination off",
                    "description": "Disable pagination",
                    "ignoreFailures": true
                },
                {
                    "text": "-gdb-set scheduler-locking on",
                    "description": "Lock scheduler for single thread stepping",
                    "ignoreFailures": true
                }
            ],
            "sourceFileMap": {
                "/boot/home/Projects/sex/": "${workspaceFolder}"
            },
            "preLaunchTask": "Build (Haiku VM)",
            "console": "integratedTerminal",
            "externalConsole": false,
            "stopAtEntry": true
        }
    ]
}
Finale
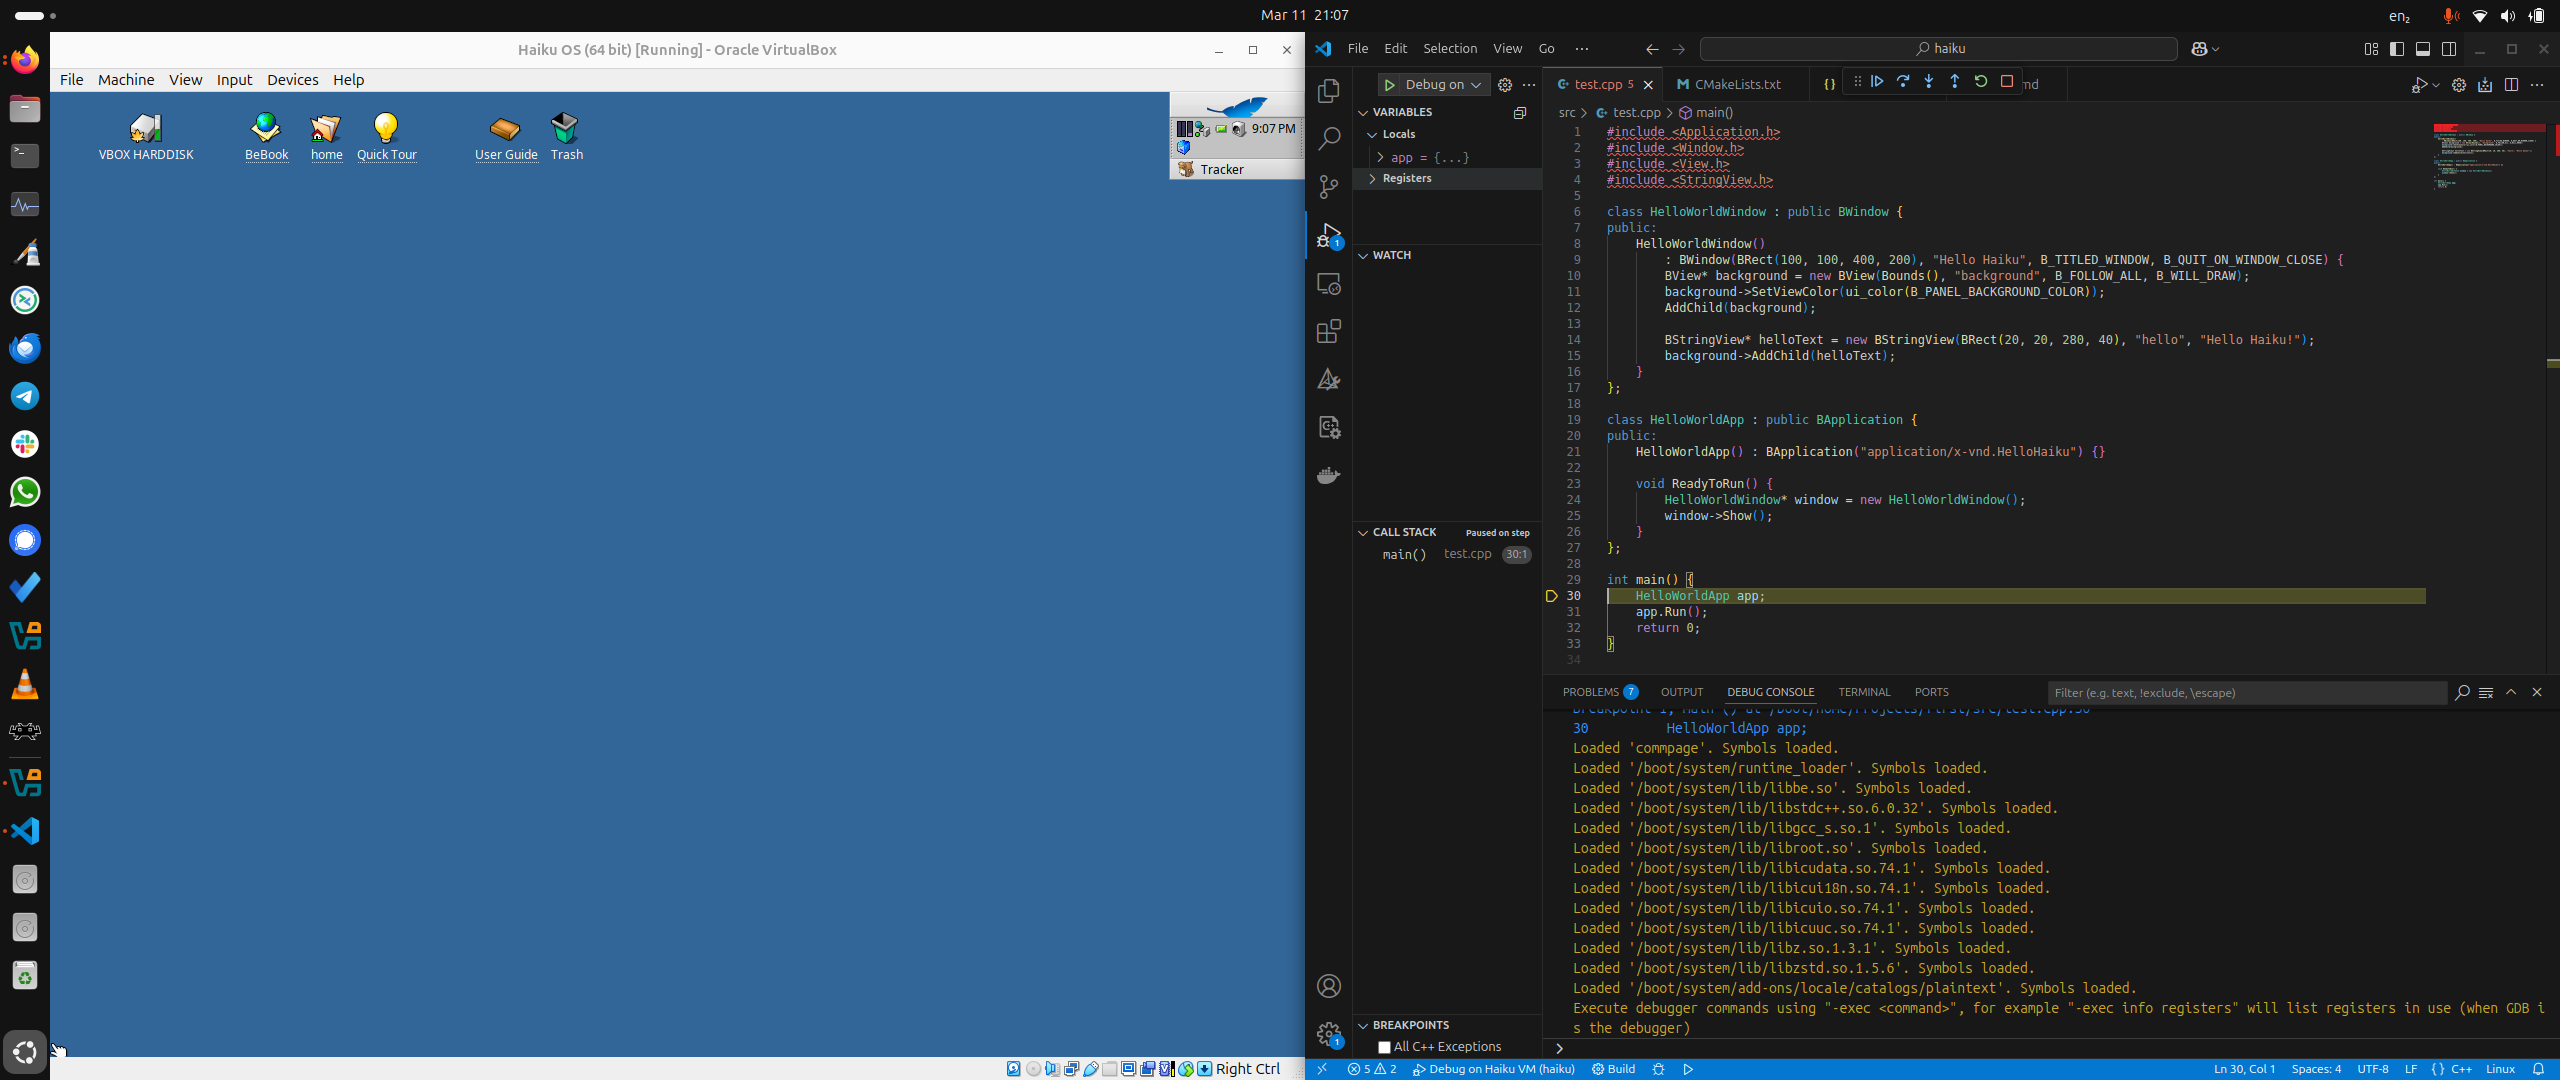
Believe it or not, we're done! You can now use this rather unconventional method to debug Haiku software.
The conventional approach would be to use
gdbserver, but it is not stable at the moment.
All that’s left is to start your Haiku virtual machine, open VSCode, and run the program.
Finally, here is a link to the GitHub repository containing a working version.