Reviving an Iskra Delta Trident Computer (Triglav)

A year or two ago, I came across a Trident computer being sold by a collector in Bosnia. The computer was in a less-than-ideal condition, missing crucial components like the PSU, hard disk, floppy disk, RAM board, and operating system (or any kind of software for that matter). Undeterred by the challenge it presented, I recently decided to embark on the seemingly impossible mission of bringing this Trident back to life. In the lot, there was also a Paka terminal that was used to operate this Trident back in the day. My plan was to tackle the terminal and computer separately, using a modern PC as a makeshift terminal during the restoration process.
Chapter 1: The Terminal
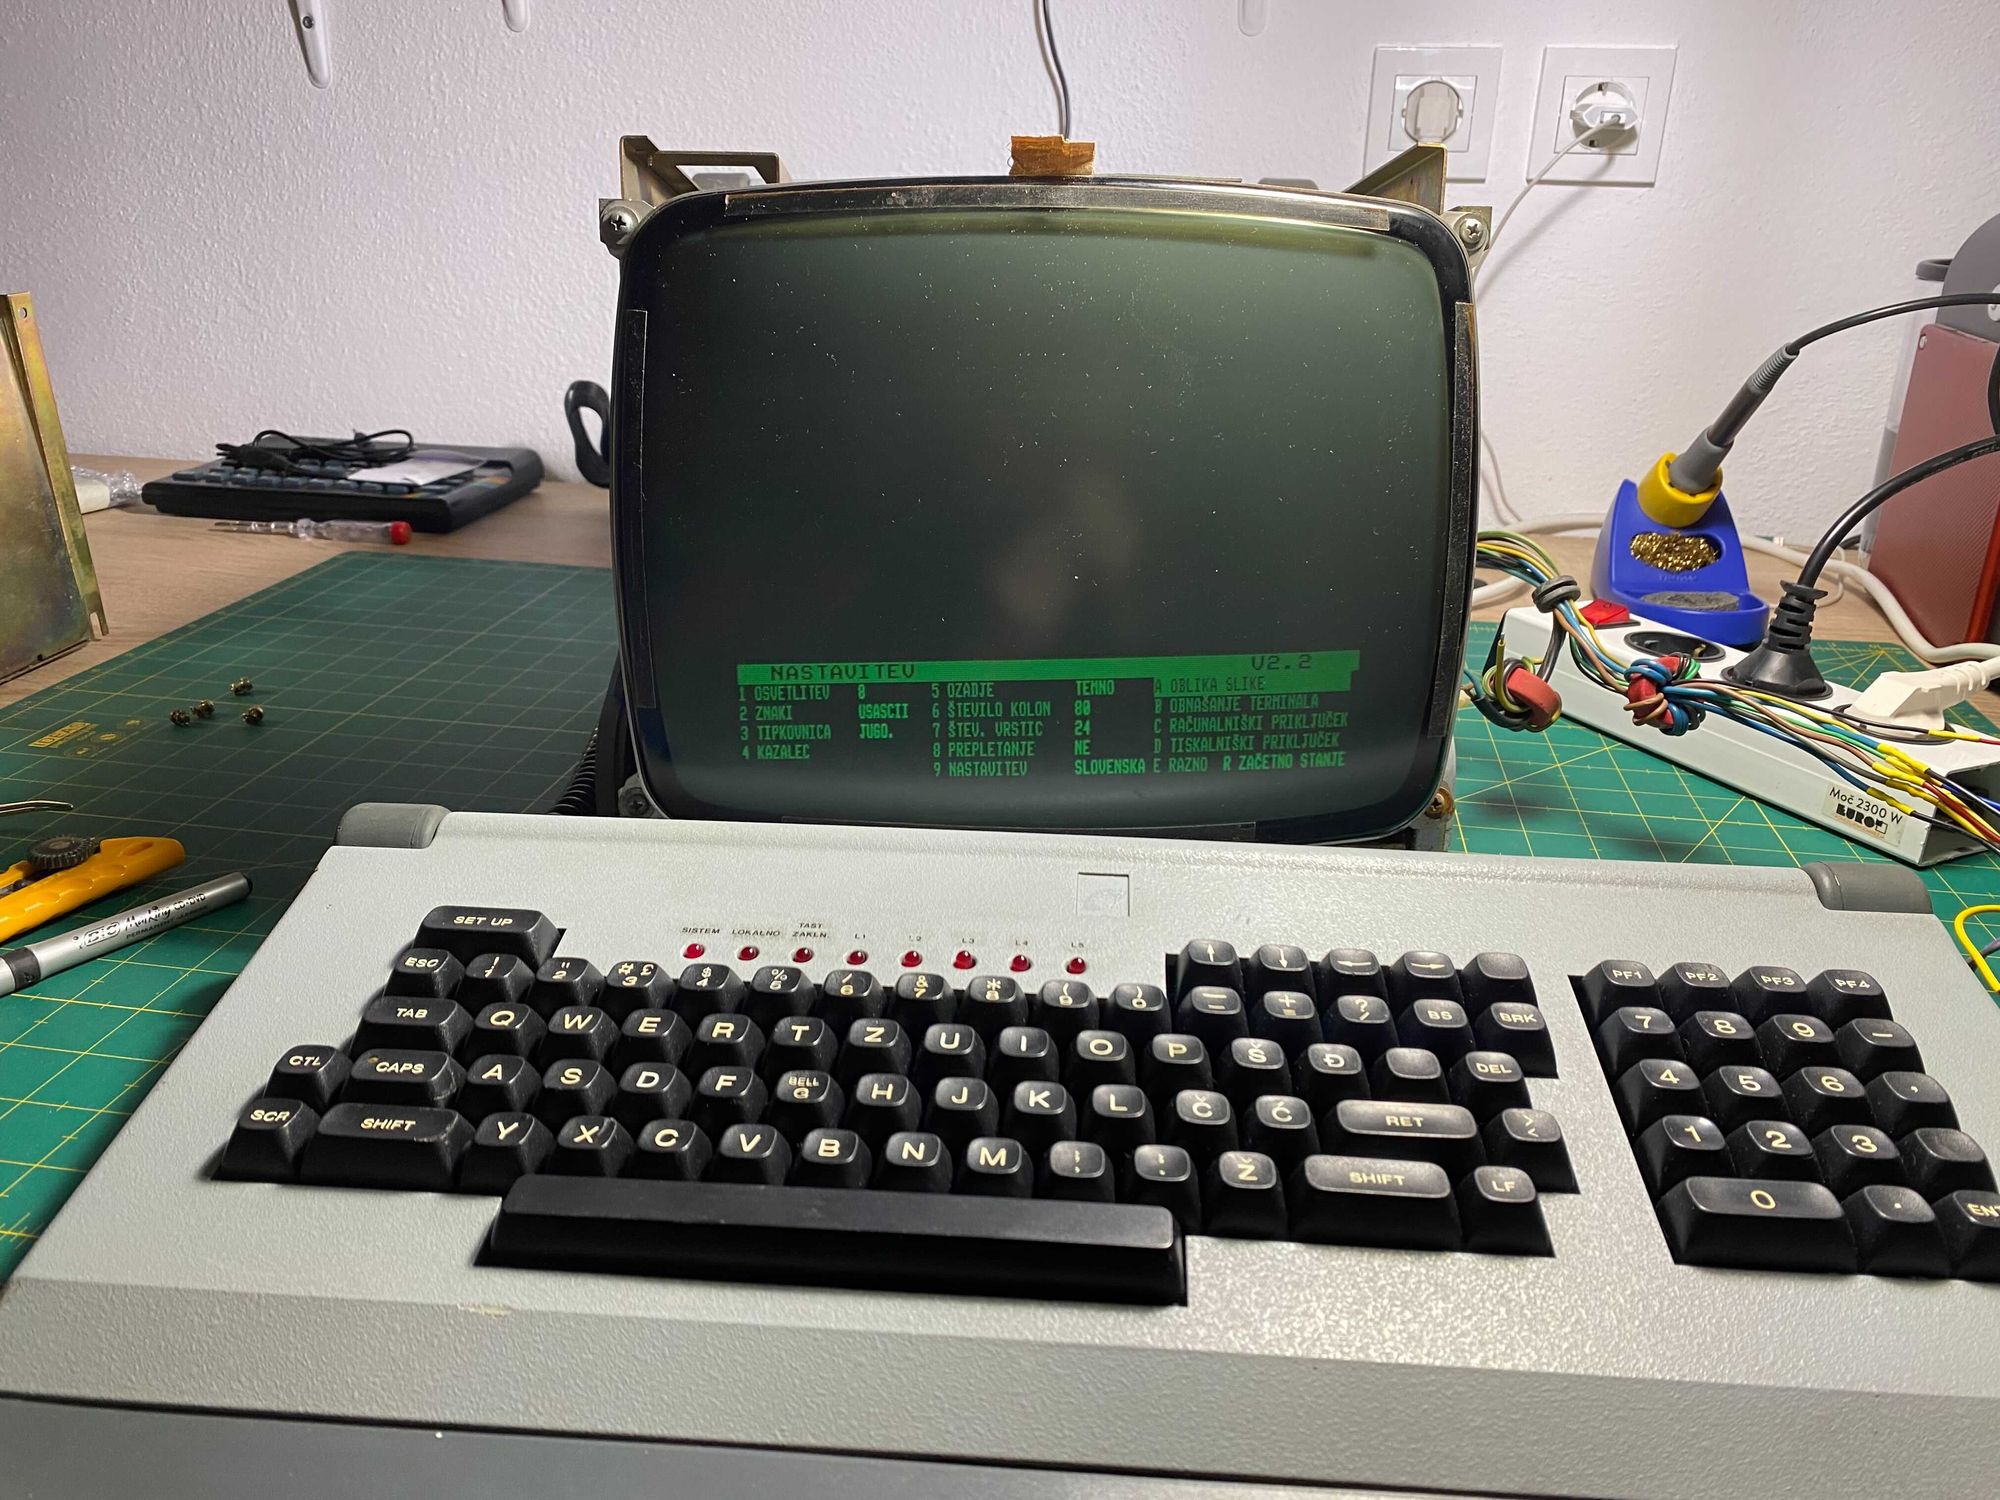
The Paka terminal, just as every computer terminal, serves as a communication bridge between the user and the computer. To my relief, the Paka appeared to be in decent shape. I powered it on, only to be greeted by the letter "H" on the screen, indicating a missing keyboard.
Fortunately, I managed to strike a deal with a fellow retro enthusiast, and obtained a really nice Paka keyboard. I connected the keyboard, hoping for a fully functional terminal. However, I encountered stability issues with the display, and eventually, the terminal froze. After some investigation, I discovered that the PSU was to blame.
To overcome this hurdle, I decided to connect the terminal to a modern ATX PSU, with an additional power supply for the 20V line. Miraculously, this resolved the display instability, and the terminal and keyboard appeared to be working well together. While I was eager to connect the terminal to the computer, I knew I needed a fully functional machine first.
Chapter 2: The Computer
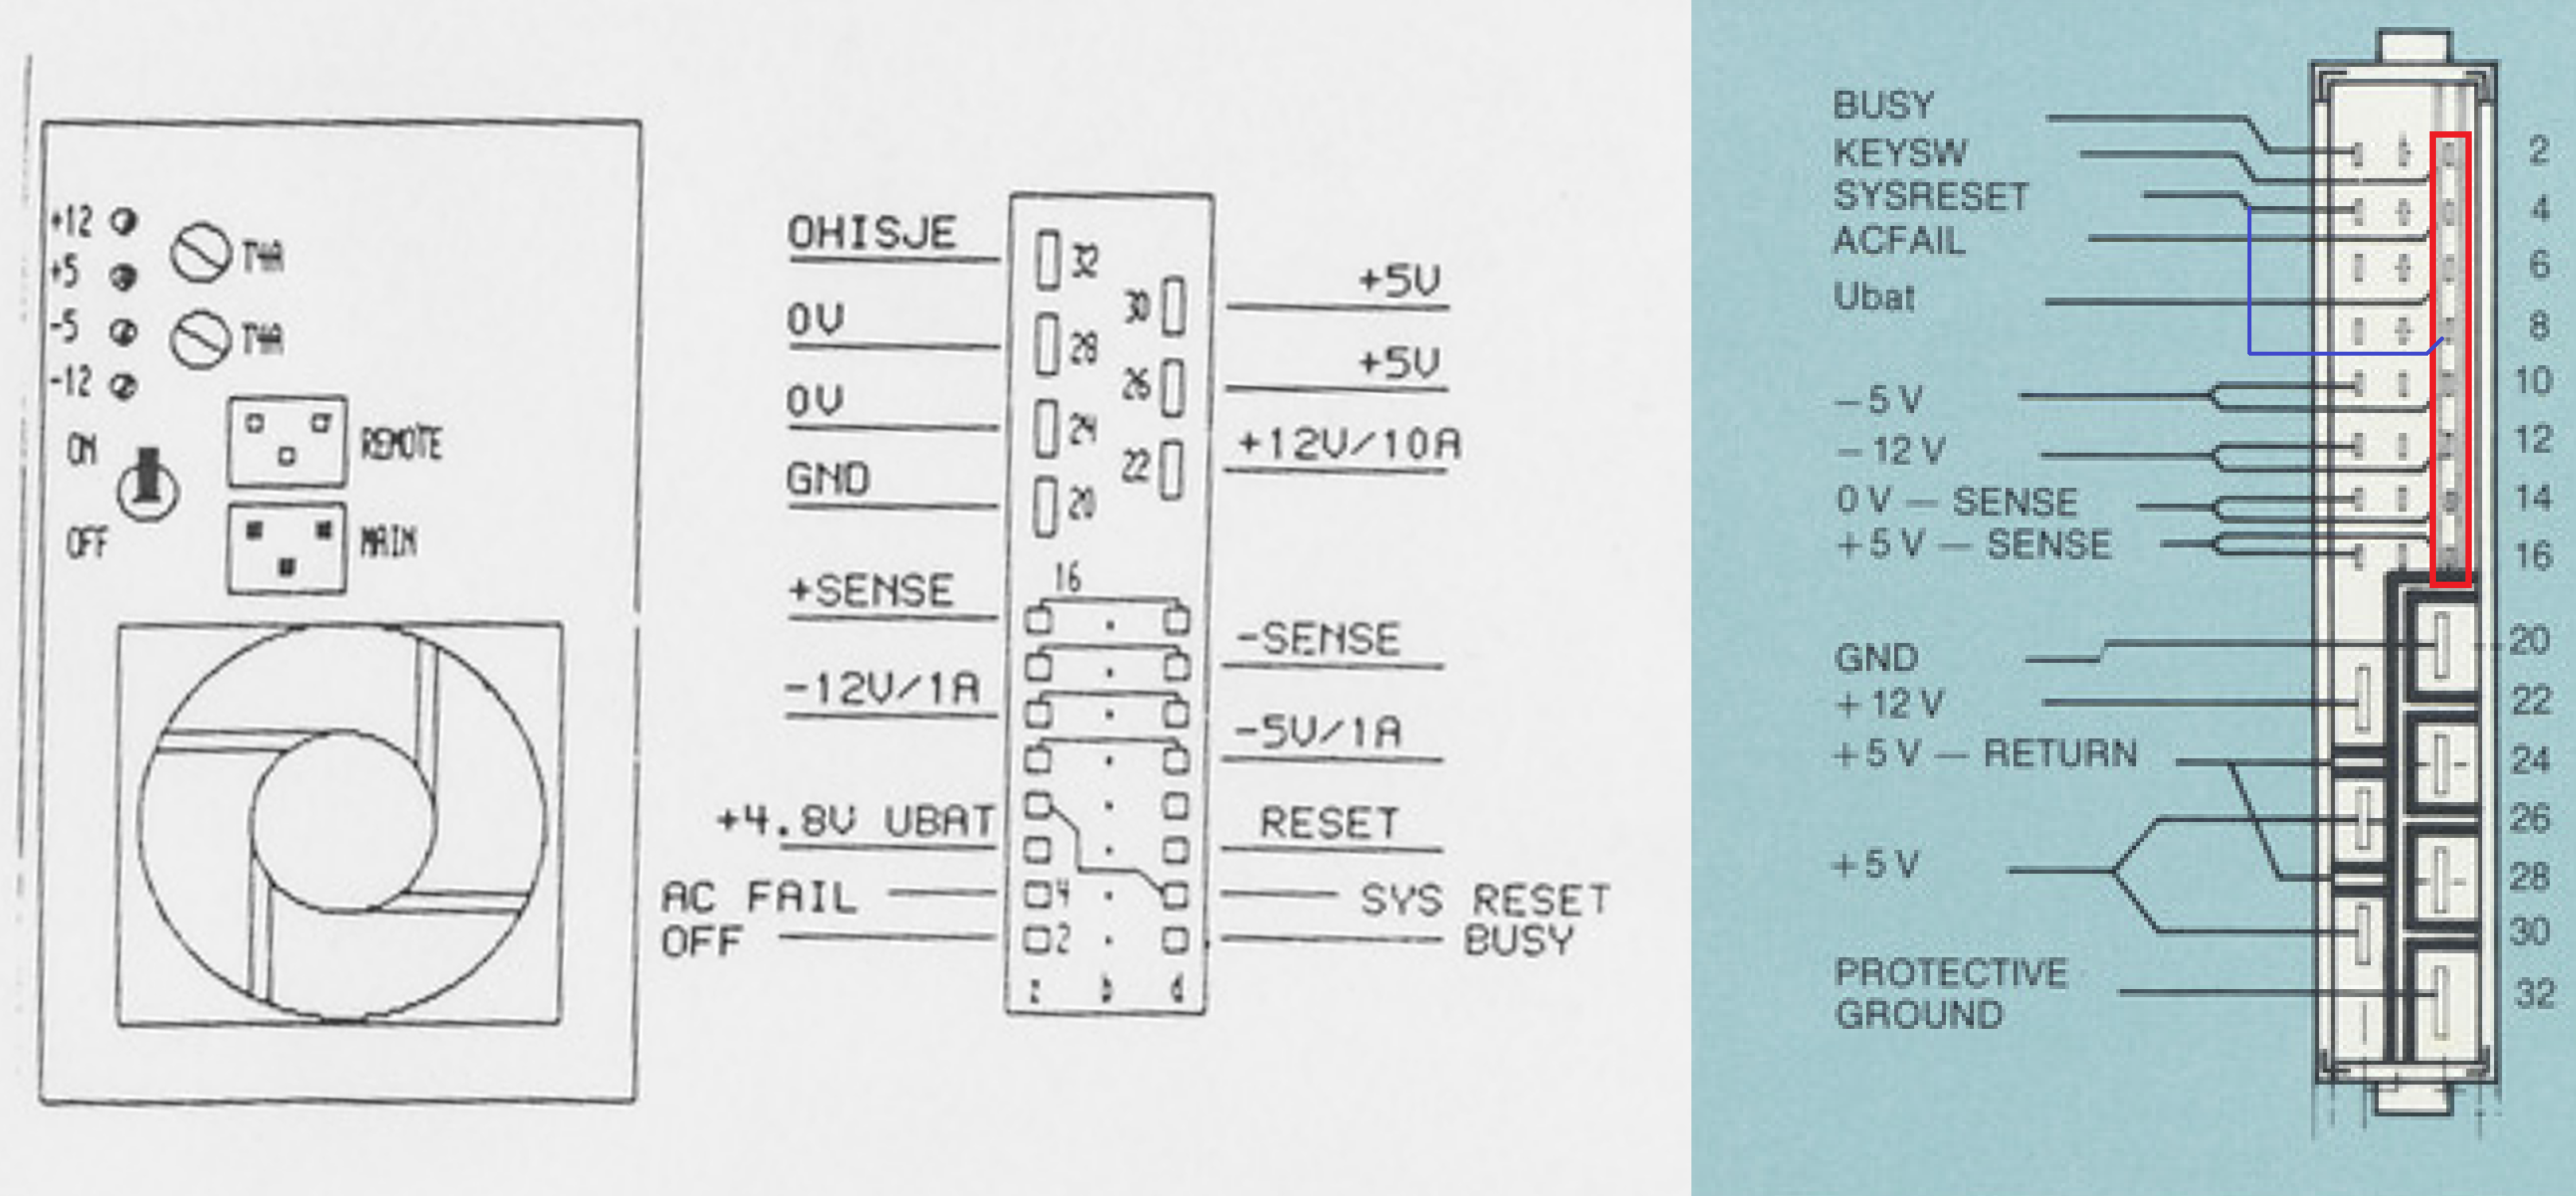
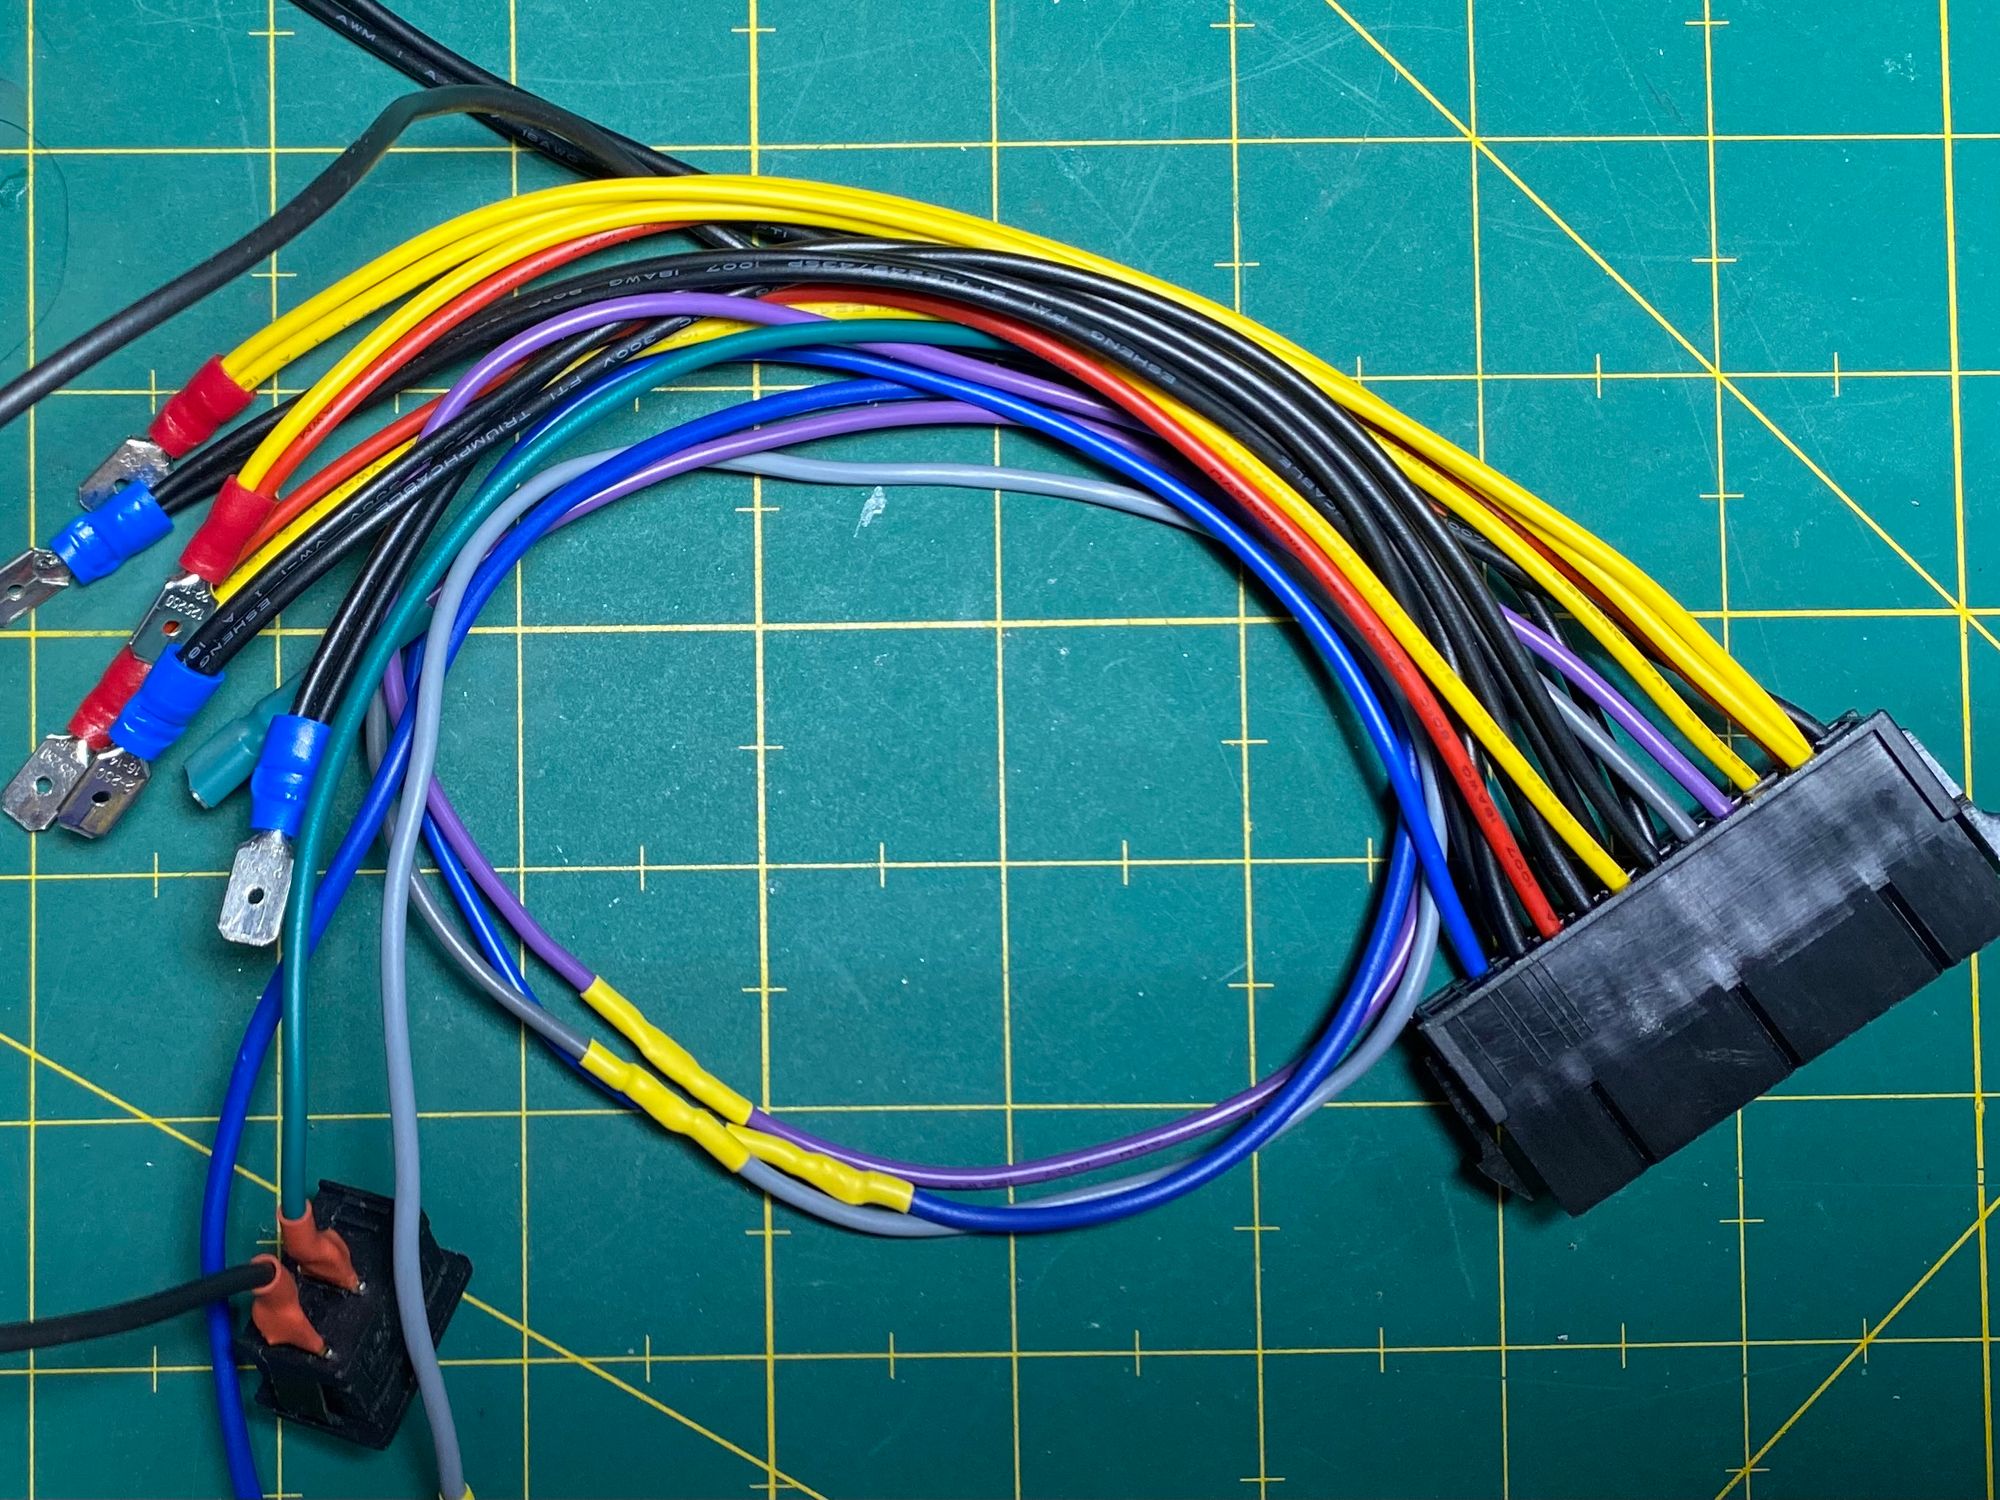
The next step in this restoration journey was to power up the Trident computer. With all cards removed, I carefully connected the empty backplane to a power supply. To facilitate this, I devised a cable that connected the Trident to an ATX PSU, albeit without certain signals provided by the original PSU.
With the backplane connected and no immediate signs of catastrophe, I inserted the J11 board (CPU) and powered on the computer. Hoping for a glimmer of success, I observed the screen of my PC, which served as a makeshift terminal.
The terminal displayed a "hello world" message: "IDC J11 boot [d: W0] (W0,W1,F0,F1,F2,F3) >". It was a joyful moment, filled with excitement. Motivated by these promising signs of life, I proceeded to install the floppy/hard disk controller ("FD/WD").
(To be continued.)
Resources
EPROM Dumps
- Paka terminal board "KLT-T" ROMs: https://files.oddbit-retro.org/pub/Triglav/Dumps/Roms/Paka/
- Paka keyboard ROM ("0269-87"): https://files.oddbit-retro.org/pub/Triglav/Dumps/Roms/Keyboard/
- Triglav communication board (ICC) ROM: https://files.oddbit-retro.org/pub/Triglav/Dumps/Roms/ICC/
- Triglav J11 CPU board: To do.
Acknowledgements
- To do.